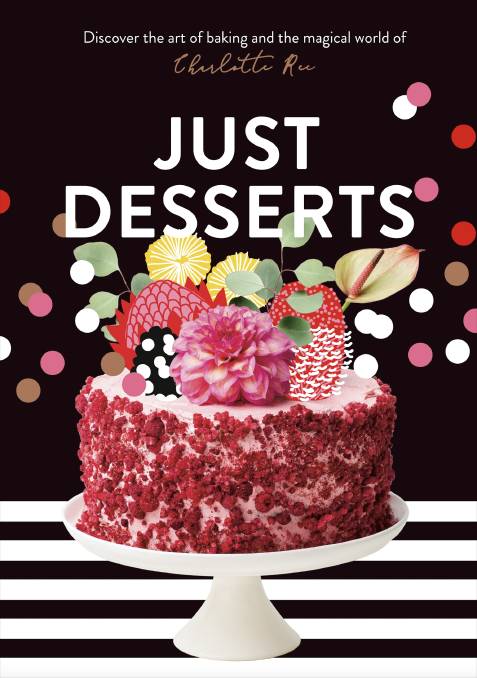
Baking should be a piece of cake, says Charlotte Ree, self-taught baker and now cookbook author.
“I am a no-fuss baker and good, delicious, mouth-watering recipes really do not have to be complicated,” she writes in the introduction to Just Desserts.
“My recipes are easy and made to taste amazing more than just look pretty.
“The book aims to fill your baking arsenal with simple, tried and tested, trustworthy staples that you can bake day in, day out, to please even the pickiest of eaters.”

Charlotte Ree’s baking book Just Desserts takes us back to basics. Picture: Luisa Brimble
Ree, now 28, picked up the baking bug late in life. She admits her mother doesn’t have a culinary bone in her body – she remembers a time her mother tried to pass of store-bought muffins as homemade ones. As a child she used to help her grandmother make jam drops.
“Whenever I beat butter and sugar together now and taste it, it takes me back to sitting on the counter in her kitchen, licking the back of a spatula,” she says.
But those times were few and far between, she says, and she didn’t bake during her teenage years.

Charlotte Ree remembers making jam drops with her nan. Picture: Luisa Brimble
“But about five years ago, work was really stressful and full on and I just started baking as a way to unwind,” says Ree, who works as the communications manager for a book publisher.
“There I was at 1am, baking, as a way to unwind.
“At work I’m attached to a screen, a computer or a phone, 24/7, all day every day and when I bake I can’t be on my phone, I can’t get distracted, I have to focus, look at the recipe, read the recipe.
“The other really beautiful part of it is within an hour you have a result, in publishing it can take months, years to get a result.
“There’s this kind of instant gratification to it and I’ve found it the best way to reduce stress in my life, it’s so calming and relaxing.”
She says there are some non-negotiables when it comes to baking; read through a new recipe in its entirety before you begin; remember no two ovens are the same; use a wooden (not metal) skewer to test your cakes; a stand mixer is a great investment (although you can manage without one).
“When I think about my nan and having morning tea with her, all of her recipes were so simple. She never owned a stand mixer, she didn’t have access to fondant, or crazy ingredients, she had fruit from her garden, and flour and sugar, but that was it.
“I wanted my approach to be the same.”

Just Desserts, by Charlotte Ree, is published by Plum, $ 29.99.
Just Desserts isn’t your typical baking cookbook. It lays flat when opened to a recipe and it’s a compact little A5 size – “so it will fit in your handbag”. There are only 30 recipes in the book, ranging from simple biscuits, tray cakes and tea cakes to a few that would be worthy of a celebration.
It’s also quirky, much like Ree herself, bright, fun, creative. Ree likes a good pun, and the book is scattered with some classics.
While it’s all about flavour, “you want to make something that looks appetising and gorgeous too,” she says. And that goes for social media too. Her Instagram account @charlotteree has more than 20,000 followers, the idea for the book came from the success of her e-book in 2017, she’s an avid follower of other inspiring accounts.
“There is so much cake porn out there,” she says, “but I love accounts that have the same philosophy as me.”
“I follow people who bake the stuff I want to eat. I love to look at posts and think that’s amazing, I have to bake that.
“And I hope people feel the same way about my book.”
Just Desserts, by Charlotte Ree, is published by Plum, $ 29.99. Photography by Luisa Brimble; styling by Lee Blaylock. Available in book shops and online from charlotteree.com.

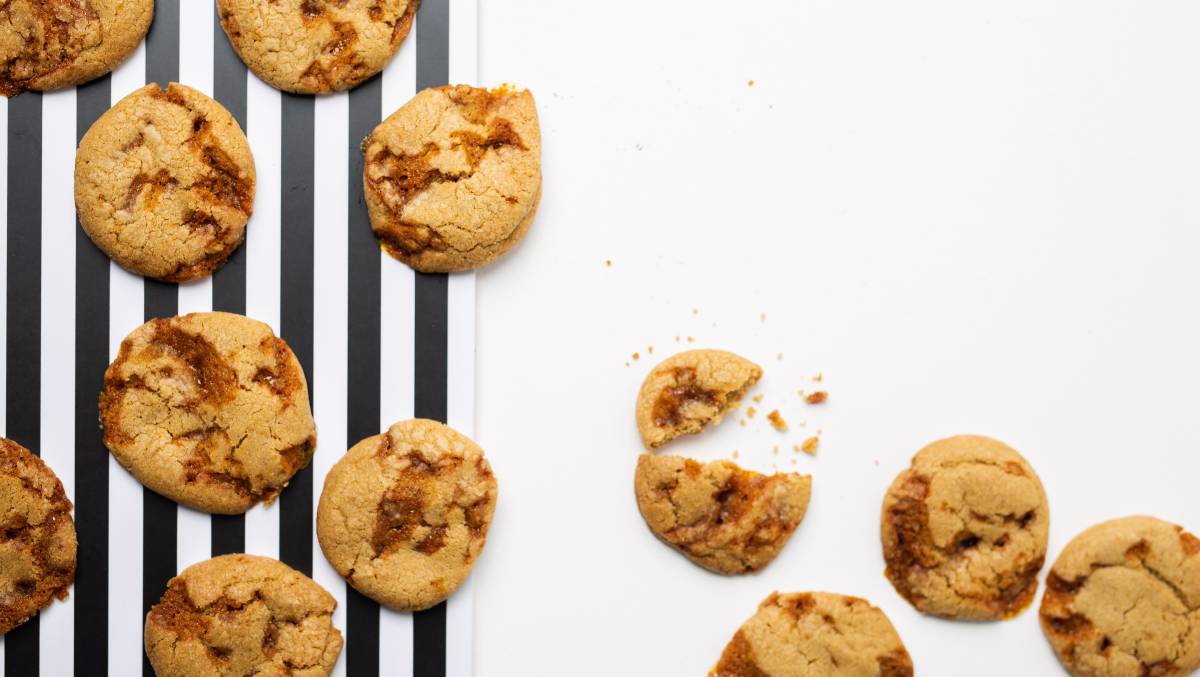
Brown butter salted caramel cookies. Picture: Luisa Brimble
Brown butter and salted caramel cookies
My friend Amelia first introduced me to the joys of brown butter, and once I had tried it there was no going back. Brown butter adds a rich, nutty taste to these cookies and creates the most wonderful aroma in your kitchen.
Ingredients
250g salted butter, at room temperature
160g brown sugar
2 tsp vanilla extract
115g demerara sugar
1 large egg, at room temperature
400g plain flour
1 tsp bicarbonate of soda, sifted
250g caster sugar
2 tsp sea salt
1. Brown 125g of the butter in a small saucepan over medium heat until amber in colour, stirring occasionally. Ensure that you keep an eye on the pan as it only takes a few seconds to burn the butter. Once browned, pour the butter into a bowl and leave to cool.
2. While your butter cools, make the caramel. Line a baking tray with a silicone mat or baking paper. Place the caster sugar and salt in a medium saucepan over medium heat. Heat the sugar until it melts, whisking constantly to avoid burning. Cook until amber in colour and smoking – if you don’t see smoke then the caramel won’t have any flavour. Pour onto the prepared tray and set aside to cool.
3. For the dough, cream the remaining butter and the brown sugar in the bowl of a stand mixer fitted with the whisk attachment until light and fluffy. Add the vanilla, browned butter, demerara sugar and egg, and mix until combined. Add the flour and bicarbonate of soda to the mixture and mix until combined. Scrape down the side of the bowl.
4. Place a clean tea towel over the cooled caramel and hit gently with a rolling pin to break it into bite-sized pieces (note that the caramel shards will be sharp but they’ll soften in the oven), then carefully fold it into the dough. Wrap the cookie dough in plastic wrap and roll into a log. Leave in the fridge for an hour.
5. Preheat the oven to 170C. Line two baking trays with baking paper.
6. Roll the dough into walnut-sized balls and place on the prepared trays, leaving a 5cm gap between each cookie to allow for spreading. If you want to be precise, I roll my dough into 25g balls. Flatten the cookies slightly using your hand. Bake for 15 minutes, or until golden. Remove from the oven and leave to cool on the tray. Store in an airtight container at room temperature for up to a week.

Apple tea cake. Picture: Luisa Brimble
Apple tea cake
This cake is completely uncomplicated and you’ll please everyone in the room by allowing the simplest ingredients to play hero. I bake with Granny Smith apples as they hold their Ingredients
Ingredients
200g unsalted butter, at room temperature
175g caster sugar
1 tsp vanilla bean paste
3 large eggs, at room temperature
225g self-raising flour, sifted
125ml full-cream milk
3 small Granny Smith apples, peeled, cored and halved
demerara sugar, for sprinkling
1. Preheat the oven to 160C. Grease and line the base of a 22cm springform tin with baking paper.
2. Beat the butter, caster sugar and vanilla in the bowl of a stand mixer fitted with the whisk attachment until light and fluffy. Add the eggs one at a time, making sure to beat well after each addition. Add the flour and milk and beat to combine. Pour the batter into the prepared tin.
3. Cut thin, deep slits into the top of each apple half. Arrange the apples cut-side down, and gently push them into the batter. Sprinkle the demerara sugar over the apples.
4. Bake for one hour, or until golden and a skewer inserted in the centre comes out clean. Leave to cool in the tin for 15 minutes before turning out onto a wire rack to cool completely. Store leftovers in an airtight container at room temperature for two to three days.
Serves 12.

Vanilla chiffon cake. Picture: Luisa Brimble
Vanilla chiffon cake
This recipe combines two of my great loves – pavlova and cake – to create a dessert that is ridiculously light and fluffy. For this recipe, you will need an angel food cake tin (ideally with a removable base and feet) to give the cake its incredible shape. The main point of difference with this recipe compared to others in my book is that you must leave your baking tin ungreased. As this cake rises, its batter is able to cling to the tin, giving it an incredibly fluffy texture and height.
Ingredients
12 large egg whites, at room temperature
1 tsp cream of tartar
275g caster sugar
2 tsp vanilla extract
150g plain flour
1.2 litres thickened cream
1 tsp vanilla bean paste
500g strawberries, halved and tops removed
sifted icing sugar, for dusting
1. Preheat the oven to 180C. Do not grease your tin!
2. In the bowl of a stand mixer fitted with the whisk attachment, whisk the egg whites and the cream of tartar on medium speed until soft peaks form. Gradually (and patiently) add the sugar, one spoonful at a time, and beat until stiff peaks form, just like a pavlova base. Whisk in the vanilla.
3. Remove the bowl from the stand mixer. Sift one-third of the flour over the egg white mixture, then fold the ingredients together with a metal spoon and repeat until fully incorporated.
4. Scrape half of the batter into the ungreased angel food tin. Using a metal spoon or spatula, smooth the batter evenly throughout the tin. Scrape the remaining batter into the tin, spreading evenly and gently smoothing the top with the back of the metal spoon.
5. Bake for 35-40 minutes, or until the top is puffed, lightly golden and springs back when touched.
6. Turn the cake upside-down immediately after pulling it out of the oven, and leave it to cool on a wire rack (or, if your tin has feet, simply rest upside-down on those). Once completely cool, gently shake the tin and run a knife around the edge to release the cake. Cut the cake in half horizontally and place the bottom half on your desired serving plate.
7. In the bowl of a stand mixer fitted with the whisk attachment, whip the cream and vanilla until stiff peaks form, though be careful not to over-whip. If you do happen to over-whip your cream, gently whisk in a few additional teaspoons of thickened cream and the mixture will balance out again. Cover the bottom half of the cake with a layer of whipped cream and strawberry halves. Place the second layer of cake on top and ice with the remaining whipped cream. To serve, top the cake with the remaining strawberries and dust with icing sugar. Store leftovers covered in the fridge for up to two days.
Tip: Because of the height of this cake, you may find the top browns too quickly. If this is the case, simply cover the cake tin with foil to prevent the top from burning.
Serves 12.
